
Cryosectioning 101 for Research Q&A

John Stock, Senior Technical Support Specialist from Leica Biosystems provides a comprehensive guide on how to achieve better cryosectioning outcomes. He covers the installation and setup of the instrument, sample tissue preparation, freezing of the tissue and how to get better tissue sections.
Questions included in the document are advice on tissue tearing, keeping sample at low temperature when working and preference for high, or low-profile blades. We’ve compiled them all into an easy to navigate format that you can access right now.
We would like to share with you the questions raised during the Q&A from the original webinar. John Stock, Senior Technical Support Specialist, responded to these questions.
1.Do you have any tips for cutting sections at -20 oC to adhere to slides that must also be -20 oC for samples that cannot get warm for downstream applications?
One of the major issues with cold slides is that they can attract moisture. They will typically be near the front of the cryostat chamber and are being moved around in the air column which will attract moisture, and moisture between your sample and the glass can prevent adhering. So, try to make sure that the glass is dry and moisture-free. As you, the user, are working in the cryostat, you are breathing forward down into the chamber, so your breath moisture can be going forward into the chamber as well. Try closing the window, but that can also help trap moisture that is in the chamber inside and still recirculate.
Different types of slides may allow better adhesion, so try different types of slides. Making sure the slide is very dry and try different adhesives may allow you to attach the sample better.
2.How fast should the temperature drop from -20 oC to -50 oC when using the fast object freezing function of the CM3050S and is this critical to achieve the result?
This is referring to the object head: the fast-freezing function that the object can go down to -50 oC. It's not critical. Because it is such a small area that it is cooling, it should cool fairly quickly and then, maybe an arbitrary term to say, it's not going to take 4 hours to cool down. As the cooling head already is at -20 oC, going down to -50 oC it should take maybe 15 minutes to half an hour depending on the chamber temperature itself, but it should cool very quickly because it is very localized cooling system for the specimen head itself.
3.With reference to distance limits to other equipment when positioning a cryostat in a laboratory, would this apply to a large format cryostat such as the Leica Biosystems CM3600 cryostat?
The large format cryostats which can do a whole rhesus monkey, like the Leica Biosystems CM3600S is a very large cryostat, it's a big chest freezer. The distance around the cryostat may not be necessary for the operation of the cooling system as it has a dual cooling system on that I believe, but just so you, the user, has room to walk around the instrument and work from different sides. The window opens from one side, but to be able to work or walk around the instrument, I would say at least one foot in general around the whole instrument, so that there's plenty of cool air being able to access the back sides and the cooling vents on the instrument.
4.Is it known that the ink does not impact any of the downstream application when you use ink in embedding?
That, we can't guarantee. The ink is there to help identify areas of the tissue and some of that pigment can have an impact later when the ink dries. So, I'm not sure and I'd have to look at the SDS sheets to see what the solvent is that helps suspend the pigment for example, if it's an oil or if it's typically just alcohol or water, but as that solvent evaporates, and I'm not sure how quickly that will be, it will still leave the pigment behind and the pigments may be background debris that may show up on your samples later on.
5.With regards to the anti-roll guide, it can get in the way when picking up the section, or sometimes it doesn't facilitate picking up the section and creates some curls. How would you troubleshoot around the anti-roll guide?
So, the anti-roll guide will typically fold down over the blade holder before you are sectioning, and once you have your section, will lift up out of the way, flipping lifting up to the left or folding forward. There's often static electricity that may pull the section as you're lifting the glass. You will have a manipulating brush that you may be able to maneuver underneath the glass as you're lifting it gently and then use to grab your section, and hold it down while you move the rest of the anti-roll glass out of the way.
For different people, and on the sample it can vary how much it may affect the sample as you're lifting and causing the problems of losing the sample being taken away with the anti-roll glass itself. It is an issue that that customers do run into, and very gently lifting the anti-roll glass, is the best way to try and make sure that you are able to get your manipulating brush underneath or some kind of probe.
6.What factor could cause the tissue to tear when the mounting slice is perfectly fine and not present in that slice?
For the tissue to tear it could be due to inconsistent freezing, or it could be a nick in the blade itself that could possibly cause an uneven sectioning plane by the knife or blade itself. You could move the blade over and try a different area or consider trying a different blade.
There may just be weak points in the tissue or could be a difference in the density of the tissue. I heard that when working with vibrating microtomes, embedding samples in agarose causes a very big difference in the density between the tissue and the supporting media and it separates from the media. It is the same idea with tissue where you have different densities. As it's cutting, the forces of the blade passing through the tissue may be easier on one part of the section versus a more dense part of a section which can pull on one side and allow the other to pass very easily, causing the barrier to separate and creating a tear.
As you're putting more mounting media over the top of the tissue before it was frozen, pushing down on the sample may have compressed the tissue that could cause areas where differences in density again may be causing that issue to tear.
If the glass is too far forward on the anti-roll guide and rubbing against the block face, it can create a tear in the sample as it's taking a section. As you're handling your sample, maybe accidentally, your tools, your brush, your forceps, or something like that may have accidentally touched the sample.
7.What is your opinion on the high-profile, versus the low-profile blade?
We offer both, as do many other manufacturers as well, I should say. I have found just from when I was a Histotech working on the bench, it ended up being more of a personal preference.
High profile blades have a larger surface area that the blade holder can clamp onto and hold the blade, so when you're working with harder materials, such as un-decalcified bone or very fibrous materials, it supports the blade better. There are a lot of customers that will still use low-profile blades for those same functions and are very happy with that. It is sometimes a personal preference.
Want to hear all of the tips & tricks for cryosectioning from John Stock? Catch up on the webinar now!

About the presenters
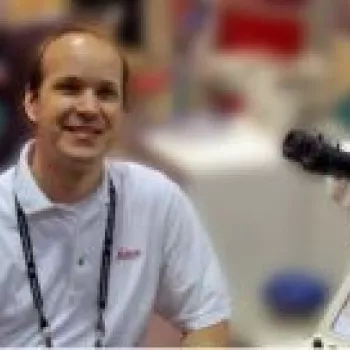
John stock is a Sr. Technical Support Specialist, and has been with Leica for the past 13 years supporting the full Leica Biosystems product line of instruments and consumables. Previously, John worked for the U. Virginia for 12 years as an Electron Microscopist and Histotech. He has a Bachelor degree in Marine Biology from the University of Wisconsin.
Rhian is a Scientist from Swansea University in Medical and Healthcare Studies and was featured in several collaborative publications. Rhian’s research-based background focused on tissue-based pathology in Multiple Sclerosis, primarily using immunohistochemical analysis and in vitro molecular techniques. She spent a short period conducting routine PCR testing for COVID-19 at the end of 2020.
Related Content


Leica Biosystems content is subject to the Leica Biosystems website terms of use, available at: Legal Notice. The content, including webinars, training presentations and related materials is intended to provide general information regarding particular subjects of interest to health care professionals and is not intended to be, and should not be construed as, medical, regulatory or legal advice. The views and opinions expressed in any third-party content reflect the personal views and opinions of the speaker(s)/author(s) and do not necessarily represent or reflect the views or opinions of Leica Biosystems, its employees or agents. Any links contained in the content which provides access to third party resources or content is provided for convenience only.
For the use of any product, the applicable product documentation, including information guides, inserts and operation manuals should be consulted.
Copyright © 2025 Leica Biosystems division of Leica Microsystems, Inc. and its Leica Biosystems affiliates. All rights reserved. LEICA and the Leica Logo are registered trademarks of Leica Microsystems IR GmbH.